
Welcome to Prepped & Pretty, a new series of blog posts that will teach you how to prepare and style your hair and makeup for performing. We all love to get dolled up to perform, but many venues and events (including Nightcap) will ask you to arrive with hair and makeup ready to save time and space. As backstage areas are often dark, crowded and frantic, preparing as much as you possibly can at home will help you to feel calm and ready-to-go on the night.
We love having perfect pin-up curls for our performances, but curling your hair can be time-consuming, and there is always the constant fear of those curls falling out before you've even hit the stage. Taking inspiration from the bombshells of the 1940s, this tutorial will show you how to do a vintage-style wet-set, using water and foam rollers to achieve a long-lasting curl. This method can create curls on even the most resistant hair (my hair is naturally poker-straight!) that will last a whole night of dancing. They do take a bit of time to do, but can be done well in advance of your event, so that's one less thing to worry about later!
This method uses water and a setting agent like a pomade, spray or mousse, and is much gentler on your hair than using heat tools. It's always a good idea to try out any new style, curling method or product well before your event, to make sure that it works for your hair type. This gives you time to experiment with roller sizes, hair sections and setting products.
Disclaimer: I am an amateur hairstyling enthusiast/not a hairdresser. This is the method that works for me, but there are many different ways to achieve this look.
Words and photographs by Eva Devore, video edited by Mia Maraschino
You will need:
A setting spray or mousse
A spray bottle with water
Hairbrush and/or sectioning comb
Foam rollers
Bobby Pins
A pretty scarf to cover your roller set

Step 1: Brush your hair, and add some of your setting product of choice- I use a strong-hold mousse for my curl-resistant hair. Apply the setting product as per the instructions on the packaging. Lightly mist your hair with water from the spray bottle. You don't want your hair to be sopping wet, just slightly damp (otherwise it won't dry properly!) Depending on the thickness of your hair, you may need to do this multiple times, or mist each section before you roll it.

Step 2: Choose your foam rollers based on your hair type, and the curl you would like to achieve. A 2cm - 2.5cm roller is a great standard size for pinup-style curls, but if your hair doesn't hold curls easily, a smaller roller can help give you a little extra staying power.
Larger rollers will give you a bigger, looser curl, but may drop out faster if your hair doesn't easily hold styles.
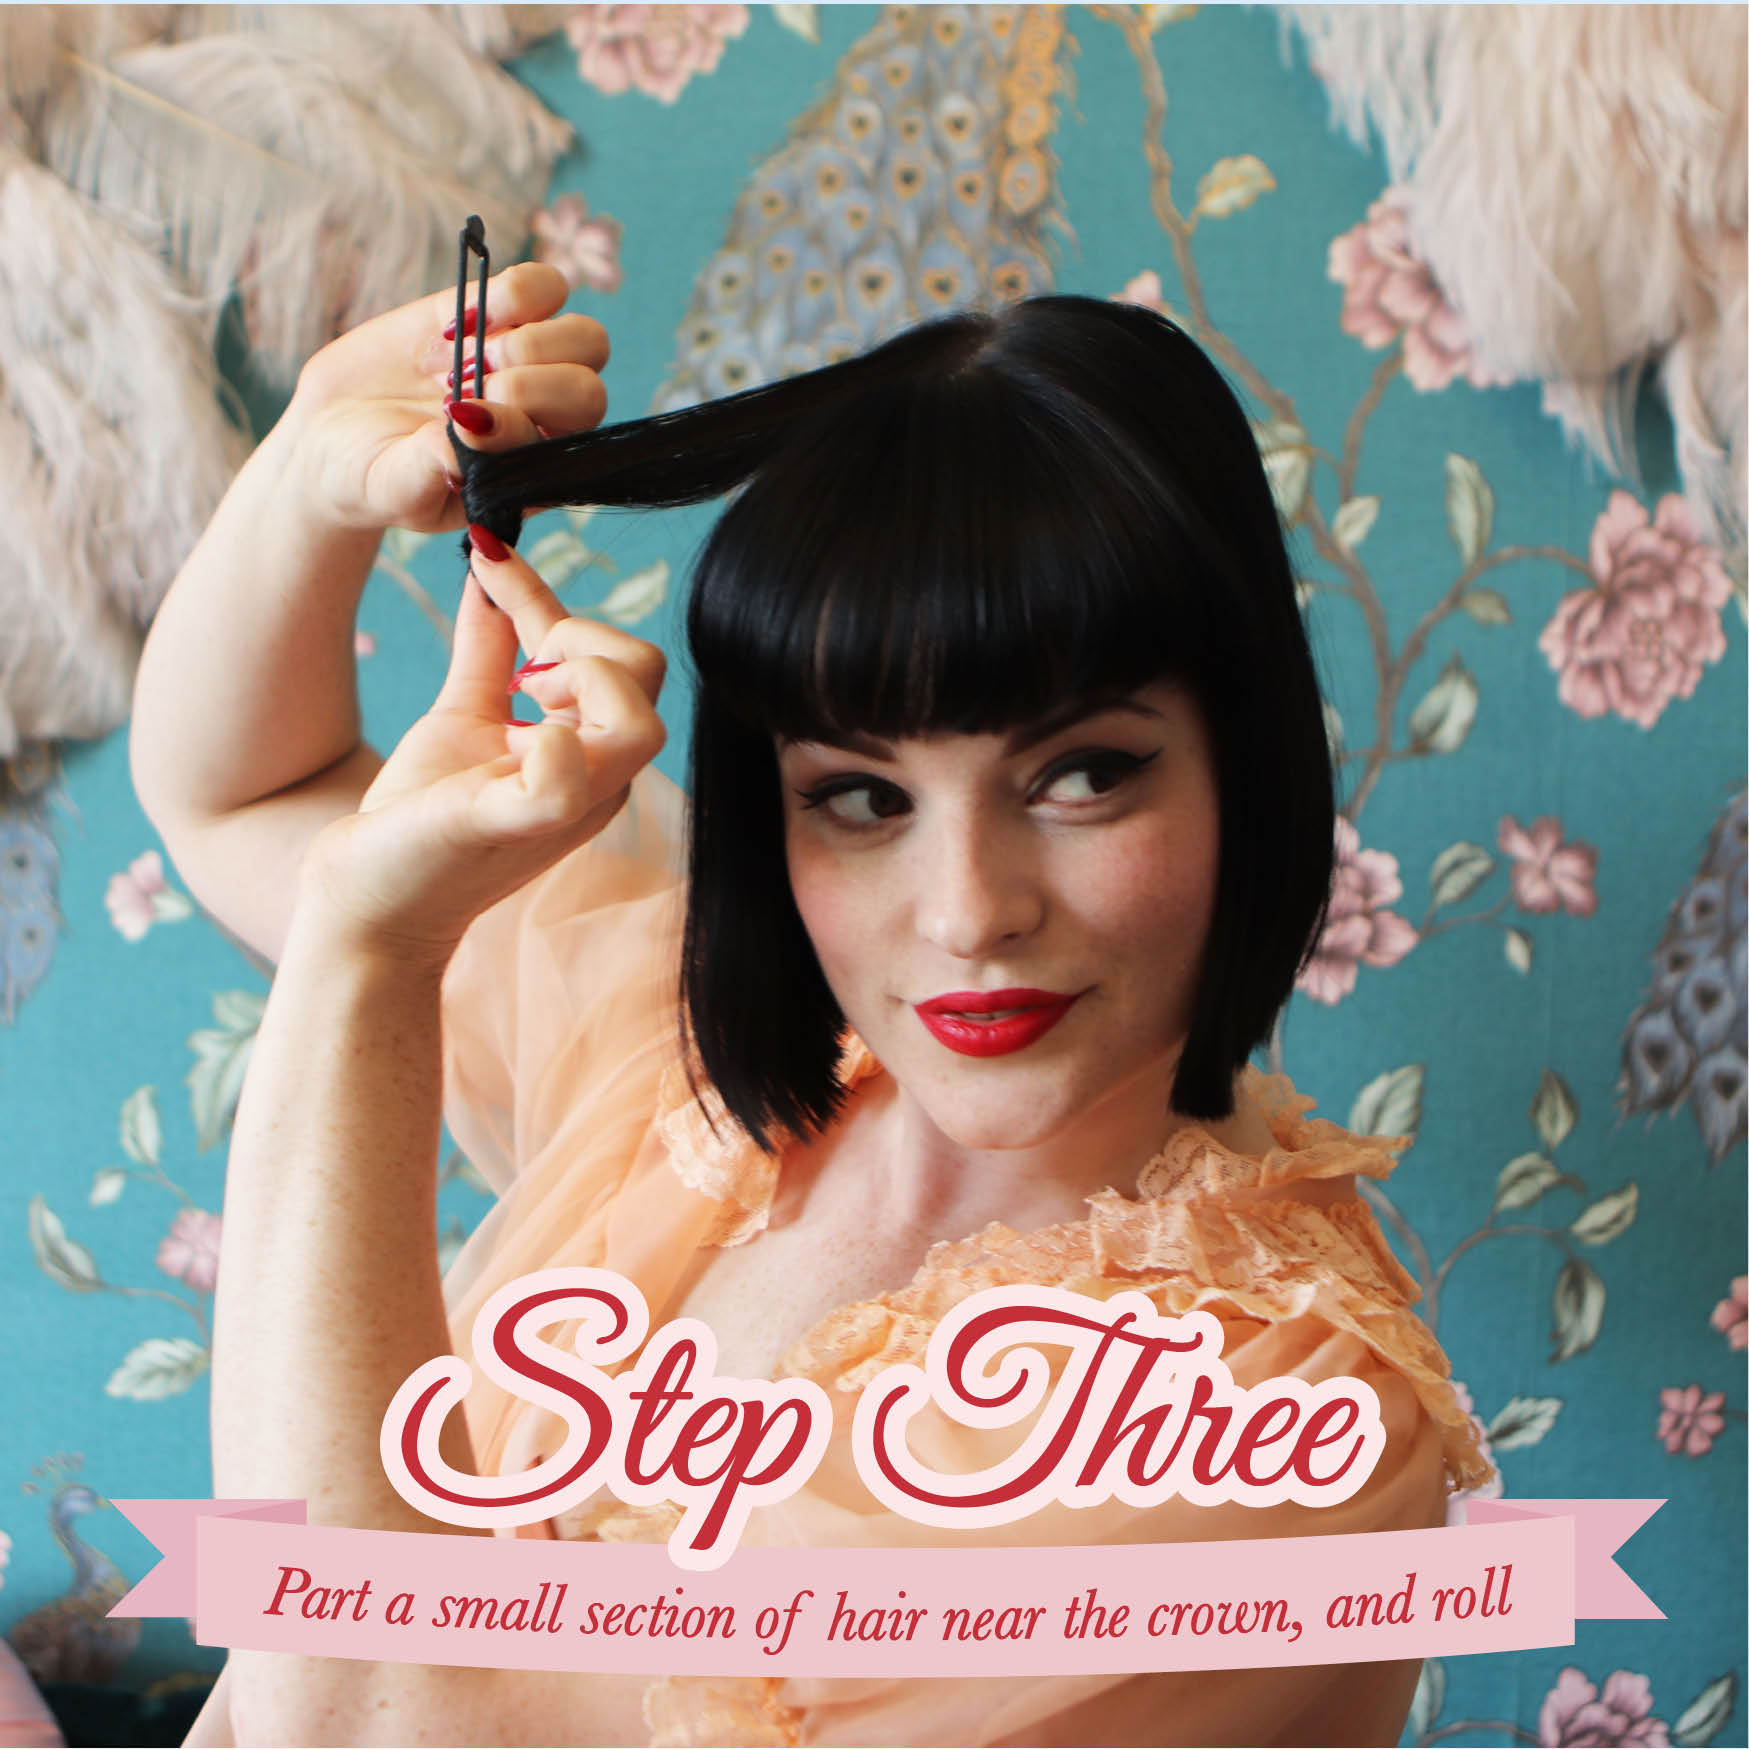
Step 3: Part your hair where you would like it for the style. I often find a side-part is very flattering for vintage hairstyles. Take a small section of hair near the part, and brush/comb it out straight.
Wrap the ends around the roller, and then roll the roller up towards your head. Rolling under or over will give a different effect to the end curl, and I usually like to roll mine under to give me volume at the roots.

Step 4: Pin the roller into place with a bobby pin, or use the attached pin if your rollers have them. Now it's time to repeat, repeat, repeat!
Take another section of about the same size from directly beneath your first roll, and repeat Step 3. Continue all the way down, with the rollers on top of each other. When you get to the bottom of your hairline, start the same process from the top of your part in the next section.

Step 5: Repeat all over your head, until all of your hair is curled up in the rollers. Doing the back of your head is tricky, so take it slowly, and if possible, use a second mirror so you can see the back as well.
If you have bangs that you would like to curl, you can use rollers to curl these under too.
Try to keep all of the rollers aligned and in the same direction, as this will give you neat, uniform curls at the end that will be much easier to brush out.

Step 6: Once all of your hair is set, leave it for the next 8 hours or so to dry completely. It's important to give yourself plenty of time to allow it to dry, as there is nothing more disappointing to remove the rollers and find damp, floppy curls! You can also leave the rollers in overnight to set, but some people find this much too uncomfortable.
If needed, you can blast your hair with a warm hairdryer to ensure the hair is dry. Just make sure your hair is completely cool before removing the rollers.
Finished! You can add a pretty scarf to cover your rollers while they dry. This will protect them while you sleep, and you can rock this cute vintage style right up until it's time to take the rollers out!
Watch the whole process in the video below, as well as a quick tutorial on how to tie your scarf.